News

Getting Cleaner, Bigger Nut Kernels- Tips for Better Results Every Time

Getting Cleaner, Bigger Nut Kernels- Tips for Better Results Every Time

If you’ve spent an afternoon cracking hard nuts only to end up with a pile of shell dust and tiny fragments, you already know how frustrating it can be. Most people assume that’s just how it goes. In reality, bigger nut kernels usually come down to using better technique, not more effort.

Getting good results is all about controlling how the shell breaks. When the shell splits cleanly, the kernel stays intact. When it shatters, the nutmeat gets crushed. That’s why understanding the basics of nut processing makes such a big difference.

Why Kernel Size Matters More Than You Think

When people talk about kernel size, they aren’t just being picky. Bigger kernels mean less waste, less time cleaning, better quality nutmeat, and more usable product at the end.

Small, broken pieces usually mean something went wrong during cracking. Either the nut wasn’t ready, the tool flexed, or too much pressure was used too fast. 

With tough nuts like black walnuts and pecans, a small change in technique can easily double what you get out of the same bucket of nuts. 

Start with Proper Nut Preparation

One of the biggest mistakes people make is cracking large nuts too soon.

Freshly hulled walnuts need time to cure. If you crack them while they’re still “green inside”, the kernels stick to the shell and tear apart. Once they’re properly dried, the kernel shrinks slightly away from the shell and comes out much cleaner.

Good preparation means letting nuts air dry for several weeks in a cool, well-ventilated place and avoiding nuts that still feel soft or damp.

This step alone improves kernel size more than most people realize. 

Moisture Content Makes or Breaks Results

Moisture is one of the biggest factors in nut processing, and it’s also one of the most ignored.


  • If the nut is too wet, the shell bends instead of cracking, and the kernel sticks inside. Everything tears instead of breaking clean.

  • If the nut is properly dried, the shell cracks sharply and cleanly, the kernel separates more easily, and you get larger pieces with less effort.

Dry shells crack. Wet shells crush. It’s that simple. 

The Best Way to Crack Black Walnuts

The best way to crack black walnuts is slowly, with controlled pressure.

Black walnut shells are extremely hard, but the kernel inside is fragile. Fast, aggressive cracking almost always destroys the nutmeat. The goal is ot apply just enough pressure to make the shell fail, and stop right there. 

Good cracking comes down to:

  • Keeping the nut from shifting

  • Applying steady pressure

  • Stopping as soon as the shell gives

If you’re hearing loud pops and explosions, you’re using too much force.

Cracking Angle Actually Matters

Most people drop a nut into a cracker without thinking about how it’s positioned. That’s a mistake.

Every nut has weak spots in the shell. If pressure is applied across those areas, the shell splits more cleanly, and the kernel quality stays intact. Once you start paying attention to this, walnut kernels come out noticeably bigger. 

Pressure Control is the Real Skill

When it comes to cracking black walnuts, pressure control matters more than strength.

Too much pressure, too fast, smashes the kernel and creates nut shell dust. Slow, steady pressure splits the shell clean and makes removal easier.

If the nut suddenly collapses, you’ve already gone too far. 

Why Most People Get Small Kernels

Small kernels almost always come from the same few problems: cracking nuts before they’re fully cured or reached full nut maturity, using weak or flexible tools, applying uneven pressure, or trying to rush the job.

None of these requires more strength. They just require better technique. 

Once folks slow down and get the process right, kernel size improves almost immediately. 

Biggers Kernels Come from Better Process

Getting bigger nut kernels isn’t about luck, and it isn’t about muscle. It’s about doing things in the right order. 


Dry nuts crack better. Controlled pressure protects the kernel. Good angles reduce shell damage. Gentle cleaning preserves what you worked for.


The people who consistently get large, clean walnut kernels aren’t stronger or faster- they just use the right process every time. And once you get that dialed in, your results get better year after year.


Top Mistakes People Make When Cracking Nuts with a Nut Cracker (And How to Avoid Them)

Top Mistakes People Make When Cracking Nuts with a Nut Cracker (And How to Avoid Them)

Cracking nuts sounds simple enough- put the nut in, squeeze, and enjoy. But anyone who’s ever tried cracking hard-shelled nuts like black walnuts knows it doesn’t always go that smoothly. A lot of folks end up with crushed kernels, tough shells flying everywhere, or sore hands from fighting with the wrong tool. 

If you’ve had trouble cracking nuts with a nut cracker, you’re not alone. Most problems come down to a few common mistakes. Let’s walk through them and, more importantly, learn how to avoid them. 

Mistake #1: Using the Wrong Tool for the Job

One of the biggest mistakes people make when cracking a nut is using whatever happens to be nearby- pliers, a hammer, or a lightweight kitchen nut cracker made for peanuts or pecans.

Hard nuts like black walnuts, hazelnuts, macadamia, or brazil nuts need a nut-cracking tool that’s built for serious pressure. A standard grocery-store nut cracker just isn’t designed for thick shells, and that’s why:

  • The shell shatters into tiny pieces

  • The kernel gets crushed

  • The tool bends or breaks

How to Avoid It

Use a walnut cracker or a heavy-duty manual nut cracker made specifically for hard-shelled nuts. These tools apply controlled pressure instead of brute force, which keeps the nut meat intact and saves your hands.

If you want extra stability while cracking, consider using a Nut cracker Base/ Wooden Platform to keep shells and nutmeats contained. 

Mistake #2: Applying Too Much Force All at Once

A lot of people think the key to cracking nuts is squeezing as hard as possible. That usually leads to smashed kernels and shell fragments everywhere. 

When using a nut cracker, pressure matters more than strength. Too much force too fast doesn’t crack the shell- it explodes it!

How to Avoid It

Apply slow, steady pressure. Let the nut-cracking tool do the work. You’re looking for the shell to split, not disintegrate. With a good manual nutcracker, you’ll often hear or feel a clean “give” when the shell cracks properly. 

For extra precision, an ergonomic Small Nut Ram can help with smaller nuts or tricky angles. 

Mistake #3: Not Positioning the Nut Correctly

Another common issue when cracking nuts with a nut cracker is placing the nut in the wrong orientation. Many people just drop it in randomly and hope for the best.

With hard nuts, this usually means:

  • Uneven cracking

  • More crushed kernel

  • Needing multiple attempts per nut

How to Avoid It

Position the nut along its natural seam or weakest point. Black walnuts especially tend to crack more cleanly when lined up properly in the walnut cracker. A small adjustment in placement can make a big difference in results. 

For more tips on preparing nuts before cracking, check out our Preparation Guide.

Mistake #4: Cracking Nuts Before They’re Properly Prepared

This one surprises a lot of people, including our customers. Fresh or improperly dried nuts are much harder to crack cleanly. The shells are tougher, and the kernels are more likely to mash.

Trying cracking a nut before it’s ready leads to:

  • Extra effort

  • Poor separation

  • Messy results

How To Avoid It

Let nuts cure and dry fully before cracking. Black walnuts, in particular, need time after harvest. Once dried, the shell becomes more brittle, and the kernel separates more easily from the shell. 

Mistake #5: Working Too Fast with Large Batches

When cracking a few nuts, technique doesn’t matter as much. But if you’re processing a bucket of walnuts, bad habits show up quickly, including sore hands, wasted nut meat, and a lot of frustration and hassle.

How to Avoid It

Use a proper manual nutcracker designed for volume. Work at a steady pace and focus on consistency. A good nut-cracking tool should let you crack dozens (or hundreds) of nuts without fatigue or flying shell debris.

The Bottom Line

Cracking nuts isn’t about brute strength, it’s about the right tool and the right technique. Most problems come from:

  • Using the wrong nut cracker

  • Applying uneven or excessive pressure

  • Poor nut positioning

  • Cracking before the nuts are properly dried

With a solid walnut cracker, slow, steady pressure, and a little patience, cracking nuts with a nut cracker becomes easier, safer, and a whole lot more satisfying. You’ll get cleaner kernels, less mess, and better results- especially when working through big batches of hard-shelled nuts. 

For extra reading on foraging and working with hard-shelled nuts, see “Black Walnuts Are a Wild Crop to Forage.” and check out real user experiences on our Reviews and Comments page.


How Do Nut Crackers Crack Nuts

How Do Nut Crackers Crack Nuts

Most folks think a nut cracker is just a simple tool. Put the nut in, squeeze, and the shell breaks. But if you’ve ever tried cracking black walnuts or hickory nuts, you already know it’s not that easy.

So how do nut crackers crack nuts without turning the nut meat into crumbs? It comes down to using pressure the right way. Once you understand “how does a nut cracker work”, it also becomes clear why some nut crackers work great, and others just make a mess.

If you’ve ever wondered how do  nut crackers crack nuts, you’ll want to see how this works with a real nut cracker like the Black Walnut Cracker we offer at Grandpa’s Goody Getter.

The Basic Idea Behind a Nut Cracker

Every nut cracker tool works on the same basic principle: it applies controlled pressure to the shell until it splits.

The trick is getting the shell to crack before the nut inside does. That’s the whole game. A good nut-cracking tool puts force where it’s needed and keeps it under control. When cracking a nut, you’re really trying to:

  • Directing force to the shell

  • Spreading that force evenly

  • Letting the shell fail before the kernel does

This is where nut cracker physics comes in.

The Physics of Cracking a Nut

Nut Cracker Physics- Leverage and Pressure

From a practical standpoint, a nut cracker is just a way to make your hands stronger without working harder. Most nut crackers use leverage to multiply the force you apply.

Instead of squeezing the nut directly, the nut cracker mechanism uses:

  • A pivot point or hinge

  • Long handles or a threaded press

  • Mechanical advantage to increase pressure

That means a little effort from you turns into a lot of pressure on the shell. You’re not muscling the nut open- you’re letting the tool do the work.

For better control and less mess, many folks also use a stable base like the Nut Cracker Base Board.

Why the Nut Doesn’t Get Crushed

If you’ve ever tried cracking nuts without a nut cracker, like using a hammer, rock, or vise, you’ve probably ended up with more shell dust than usable nut meat. 

That’s because those methods don’t control where the force goes. A proper nut cracker design focuses pressure right on the shell, usually along a seam or weak spot. The pressure builds slowly, and the shell gives way before the kernel does.

That’s the difference between cracking and smashing.

If you’re working with fresh nuts, proper preparation also matters. Grandpa’s full prep guide explains drying and curing before cracking.

Common Nut Cracker Designs (& How Nut Crackers Apply Force)

Not all metal nut crackers work the same, and this is where a lot of people get tripped up.

Lever-Style Nut Crackers

These are the common plier-style nut crackers that you see in most kitchens. Two arms pivot at a hinge and squeeze the nut from both sides.

They work fine for soft nuts like pecans or English walnuts, but they don’t have much leverage. On hard nuts, they usually just crush the kernel or slip off the shell. 

Screw or Press-Style Nut Crackers

They use a threaded rod or a press to slowly increase pressure. Instead of one hard squeeze, you turn a handle and feel the shell start to give.

This type of nut-cracking tool works much better for tougher shells because you’re in control the whole time. You can stop as soon as the shell cracks instead of going too far. 

Heavy-Duty or Frame Nut Crackers

These are built for serious nuts like black walnuts, hickory, and butternuts. They have a rigid frame that doesn’t flex, and the pressure is applied in one straight line.

Most of these designs combine leverage an a press mechanism. That’s why tools like the Grandpa’s Goody Getter Black Walnut Cracker can handle shells most kitchen nut crackers can’t. 

Why Some Nut Crackers Fail on Hard Nuts

Once you understand “how does a nut cracker work”, it’s easy to see why some of them struggle.

Most nut cracker failures happen because:

  • The frame bends under pressure

  • The nut isn’t held in a stable position

  • There isn’t enough leverage

  • The pressure is uneven

Hard-shelled nuts need steady, controlled force. If the fool flexes or shifts, the pressure goes into the kernel instead of the shell. 

You can see real-world experiences from folks who crack these nuts every season here!

Choosing the Right Nut Cracker Based on How They Work

When you understand “how do nut crackers crack nuts”, picking the right one becomes pretty straightforward.

For softer nuts, a basic lever-style nut cracker is usually fine. For mixed nuts, a screw or press-style tool gives you more control. For black walnuts or hickory nuts, a heavy-duty frame-style nut cracker is almost a necessity.

The harder the shell, the more important leverage, pressure control, and a strong, rigid tool become.

Final Advice from Expert Nut Crackers

A nut cracker isn’t magic- it’s just a simple tool that smartly uses basic physics.


Nut crackers work because they focus pressure on the shell, use leverage to multiply your effort, and let the shell fail before the nut inside does. Once you understand the nut cracker mechanism and a little nut cracker physics, it’s easy to see why some tools crack clean, and others just crush.


In the end, cracking nuts well isn’t just about strength. It’s about using the right nut cracker design, taking your time, and letting the tool do what it was built to do.  

How Do You Remove Black Walnut Stains?

How Do You Remove Black Walnut Stains?

That’s one of the most common questions we hear every fall, usually right after someone looks down at their hands and realizes they’re no longer their original colour.

If you work with black walnuts long enough, you’ll meet these stains face to face. They’re dark, stubborn, and seem to show up everywhere: on skin, clothes, tools, and work surfaces. Let’s talk about why black walnut stains are so difficult to remove, what causes that deep discoloration, and what actually works (and doesn’t).

Why Black Walnut Stains Are So Hard to Remove

Black walnut stains come from a natural compound called juglone found in the hulls. When the hull is crushed or cracked open, that dark liquid is released and reacts with oxygen. Once it oxidizes, it behaves just like a permanent dye. 

That’s why:

  • Stains darken over time

  • Washing later is much less effective

  • Skin, fabric, and porous surfaces soak it right in

That is also why your black walnut stains last so long, especially on your skin and clothing.  Anyone who’s ever cracked walnuts without the right setup learns this lesson fast. 

How to Get Black Walnut Stain Off Hands (and Skin)

So, let’s start with the basics and most common issue- how to get black walnut stain off hands (and skin).

If you act quickly, you can reduce how dark the stain becomes. A few things that can help before the stain fully sets include:

  • Washing with warm water and soap as soon as you’re done cracking walnuts

  • Gently scrubbing with baking soda or salt to remove surface staining

  • Using lemon juice or vinegar to help lighten the color

When people ask us how to remove black walnut stains from skin, we always give the honest answer- once juglone has fully set, there’s no instant fix. The stain fades over time as your skin naturally sheds. Around here, stained hands are just part of the season and a badge of honor for a timeless skill. 

Black Walnut Stains on Clothing and Fabrics

Clothing is even more of a problem than skin. Black walnut stains many fabrics permanently, especially cotton and denim. Even commercial cleaners don't always work once the stain has oxidized. 

That’s why most experienced walnut crackers wear old clothes they don’t mind staining. If you catch a spill immediately, you may be able to lighten it, but many shirts and gloves eventually become dedicated “walnut cracking” gear, so they don’t miss out on the experience. 

Stains on Tools, Floors, and Work Surfaces

Black walnut stains don’t stop with hands and clothes. Concrete floors, wood surfaces, and tools can all darken if the juice isn’t cleaned up quickly.

Wiping tools down after use helps prevent long-term discoloration, but porous surfaces can absorb the stain permanently. Many of our customers set up a specific cracking area where stains aren’t a concern, which makes the whole process easier and more enjoyable.

Preventing Black Walnut Stains in the First Place

The best way to deal with black walnut stains is to reduce the mess in the first place. 

Most heavy staining happens when walnuts are smashed with hammers, crushed by hand, or run over with heavy-duty vehicles. That’s when hull juice spatters everywhere. Using a controlled but cracker keeps the walnut contained and limits how much juice escapes. 

Many customers tell us they noticed fewer stains after switching to a tool like our Grandpa’s Goody Getter Nut Cracker because the cracking process is more controlled and predictable.

Less splatter means cleaner hands, cleaner tools, and less cleanup when you’re finished.

What Our Customers Have Learned

Good tools won’t eliminate stains, but they do make a huge difference. Using equipment designed specifically for black walnuts helps reduce:

  • Flying hull pieces

  • Excess juice spray

  • Unnecessary hand contact

If you’re new to cracking walnuts or looking to improve your setup, our Black Walnut cracking products help you to crack without the hassle. 

So, how do you remove black walnut stains?

Sometimes you scrub.

Sometimes you lighten them.

Sometimes you wait them out.

But most of the time, you accept them as part of working with real black walnuts- a small price to pay for good nutmeats and a job done right.

And if better tools mean fewer stains and less mess along the way, that’s exactly why we build them.

Happy cracking!

[H3] For Next Time


When working with black walnuts, wear rubber or nitrile gloves. The green hull juice stains fast.


Since you work with black walnuts for Grandpa’s Goody Getter, keeping a bottle of pumice hand cleaner in your shop might be worth it.


How Grandpa’s Goody Getter Compares to Other Nut Crackers

How Grandpa’s Goody Getter Compares to Other Nut Crackers

Anyone who’s spent time cracking nuts eventually asks the same question: what actually works best?

There’s no shortage of ways to crack nuts. Over the years, folks have tried everything from hand nut crackers and hammers to shop vises and electric machines. Some work better than others, and some are better suited for certain jobs.

This article takes a straightforward look at how Grandpa’s Goody Getter black walnut nut cracker compares with other common nut-cracking methods, especially for hard-shell nuts like black walnuts: no sales talk, just practical experience and real tradeoffs. 

Hand Nut Crackers

Traditional hand nut crackers work well for soft-shell nuts like pecans, English Walnuts, or almonds. They're inexpensive, easy to store, and familiar to most people.

When it comes to black walnuts, though, hand nut crackers struggle. The shells are thick, uneven, and extremely hard. Most hand crackers don’t apply enough force, or they crush the nut unevenly, turning kernels into small pieces. They can also be tough on the hands, especially when cracking more than a few nuts- try shears instead. Shears will snip any kind of shell nuts.

Hammers and “Smash” Methods

Using a hammer, mallet, or even a rock is one of the oldest methods around. It works in the simplest sense- hit the nut hard enough, and it breaks. 

The downside is control. Shell fragments fly, kernels get crushed, and hands are usually right in the line of fire. It’s also messy, loud, and not very efficient if you’re trying to save whole nutmeats.

Plenty of people start this way, then look for something better after the first few batches, such as a small nut ram. A small nut ram is designed for any nuts smaller than 1 inch of shell nuts.

Vises and Clamps

Bench vises and C-clamps give you more control than a hammer. By applying steady pressure, you can sometimes crack a black walnut without completely crushing the kernel.

The drawback is speed and convenience. Each nut has to be positioned carefully, and it’s a slow process if you’re working through a bucket of walnuts. Vises also aren’t designed specifically for nut cracking, so results can vary depending on shell shape and size.

Electric Nut Crackers

Electric nut crackers can handle volume, and some are built specifically for hard-shell nuts. When they’re dialed in correctly, they can produce good (but not great) results.

That said, they come with tradeoffs. Electric units are expensive, take up space, and require power. They also involve more moving parts, which means more maintenance. For many home users, they’re more machines than they actually need.

Where Grandpa’s Goody Getter Fits In

Grandpa’s Goody Getter was USA-built with one job in mind: cracking hard nuts like black walnuts in a controlled, repeatable way.

Instead of smashing or squeezing blindly, it applies focused pressure where it counts. That control helps improve kernel yield, reduce flying shell fragments, and make the process easier on hands and wrists. It’s simple, durable, and doesn’t require electricity or a complicated setup.

Many customers land here after trying other methods and realizing they want something safer and more consistent- without turning their walnut cracking into a full-blown production line.

Best for:

Hard-shell nuts, repeated use, and folks who value control. 

Choosing the Right Tool for Your Needs

The “best” nut cracker depends on what you’re cracking and how often you’re doing it.

If you crack a handful of pecans once a year, a hand nut cracker might be all you need. If you’re working through buckets of black walnuts every fall, tools designed specifically for hard shells make a big difference.

What matters most is matching the tool to the job- something experienced nut crackers learn pretty quickly. 

Prepare your black walnuts before attempting cracking.

Lifetime Guarantee Warranty

Time to Get Cracking!

There’s no single right way to crack every nut. Different methods have their place, and most people try more than one before settling into what works for them.

Grandpa’s Goody Getter fits into that progression as a practical, purpose-built tool for hard-shell nuts. It’s not the fastest machine on the market, and it doesn’t try to be. It’s built to do one job well, season after season.

If you’re cracked enough black walnuts to know the difference, you already understand why that matters.

Happy cracking!

When Do Black Walnut Trees Produce Nuts?

When Do Black Walnut Trees Produce Nuts?

That’s a question we hear every year from our customers, desperate to get started on their nut cracking or right about the time green walnuts start dropping into yards, driveways, and fence rows. So, when do black walnut trees produce nuts?

Black walnut trees don’t follow a strict calendar, and they don’t produce the same amount of nuts every season. Knowing when they start producing, how often they bear fruit, and what affects their yield helps set realistic expectations. Whether you’re watching a single backyard tree or checking a few trusted foraging spots each fall, nut production knowledge is power.

When Black Walnut Trees Begin Producing Nuts

Black walnut trees are slow to mature. Most trees won’t produce nuts until they reach around 8 to 10 years old, and even then, yields are usually light. Reliable production typically doesn’t begin until the tree reaches 15 to 30 years of age.

Once mature, a healthy black walnut tree can produce a good number of nuts, but not necessarily every year. Like many nut trees, black walnuts have heavier years and lighter years, and that’s just the way they work. 

What Time of Year Are Black Walnuts Produced

Black walnut trees follow a pretty consistent seasonal pattern. In spring, the tree flowers, and wind handles the pollination. Over the Summer, the nuts grow inside their thick green hulls. 

By early to mid-fall, most black walnuts are mature and start dropping. Warmer regions may see nuts falling a little earlier, while cooler climates might push harvest closer to late October.

Typical Harvest Window

A simple rule: when nuts start falling on their own, they’re ready to collect. That’s all the signal most seasoned harvesters need. 


How Often Black Walnut Trees Produce Nuts

Once they’re mature, black walnut trees technically produce nuts every year, but how many you get depends on several things. The weather is a big factor. Late spring frosts, poor pollination, or a dry summer can all reduce yields.

It’s normal for one year to be overflowing and the next to be modest. That’s just black walnuts keeping us humbler- and it keeps harvest time interesting, too.

Where Are Black Walnut Trees Found

If you’re wondering “where are black walnut trees found?”, they’re native to much of the central and eastern United States.

They like deep, well-drained soil and plenty of space to grow. You’ll often see them along:

  • Fence lines and field edges

  • Creek banks and river bottoms

  • Open woodlands

  • Old farmsteads

They don’t thrive in shallow, wet soil, so you won’t usually spot them in swampy areas.

Where to Find Black Walnut Trees for Foraging

For those customers asking “where to find black walnut trees”, some of the best spots aren’t deep in the woods. 

Look around:

  • Old farms or abandoned homesteads

  • Pastures and rural roadsides

  • Property lines and hedgerows

Mature trees stand out. And in the fall, a scattering of green hulls on the ground is usually the first sign you’ve found one. Just make sure you have permission before collecting nuts on private land. 

Read our blog “Black Walnuts are a Wild Crop to Forage” for more foraging tips.

How to Tell When Black Walnuts Are Ready to Collect

You don’t need fancy equipment to know when black walnuts are ready.

When the nuts start falling naturally, they’re mature. Hulls may still be green at first and darken over time. Some people collect right away, while others wait until hulls soften slightly. Either way works. 

Once you start gathering, having the right tools helps. Many folks move straight to processing using a Grandpa’s Goody Getter Nut Cracker, which keeps the process tidy and saves your hands from bruises and stains. 

Why Black Walnut Production Varies From Year to Year

Black walnut production isn’t perfectly predictable. Weather during flowering affects pollination, while summer conditions influence nut development. Additionally, tree age and overall health are important factors.

This natural variation is just part of the harvest. Some years are exceptional, some modest, but that’s what keeps us checking the same trees harvest season after harvest season.

Planning Ahead for Black Walnut Season

Black walnut season can sneak up on you as a nut collector. One day, the trees are full of green hulls, the next, the nuts are dropping everywhere. The key is knowing what to expect and being ready. 

Keep an eye on your trees or your favourite local spots. When nuts start hitting the ground, that’s your signal to begin collecting. Remember, not every year is a bumper crop. Some years you’ll fill buckets on a weekend, other years you might only get a handful. That’s just black walnuts being black walnuts. 

Having the right tools makes a world of difference. Using a Grandpa’s Goody Getter Nut Cracker keeps the work neat, reduces mess, and protects your hands. Gloves, old clothes, and a plan for storing or processing nuts make the season smooth and enjoyable.

Approach it like a ritual, not a race. Check your trees, gather what’s ready, and enjoy the work. When those nuts start piling up, you’ll see why a little preparation pays off every fall.

To discuss more, or ask other questions like “when do black walnut trees produce nuts”, get in touch today!

A Guide on How to Crack Black Walnuts

A Guide on How to Crack Black Walnuts

Black walnuts are a delicious, often overlooked treasure of the forest. With their distinct, robust flavour, they're worth the extra effort it takes to get into them! Here is your guide to how to crack black walnuts and how best to enjoy them.

How to Harvest Black Walnuts

Harvesting black walnuts is a simple process, but it requires a bit of timing and planning. The ideal time to gather them is in the early fall, usually from September through October, after they have fallen from the tree.

Timing: Look for naturally fallen walnuts. Do not pick them from the tree, as they are likely not fully ripe.

Collection: Wear gloves! The husks of black walnuts contain a strong, dark stain that can permanently discolour your hands, clothes, and even concrete.

Hulling: The first step is removing the thick, green or black husk. This is the messiest part. You can do this by stomping on them or using a special hulling tool. The goal is to separate the hull from the hard inner shell.

Washing and Curing: Once hulled, wash the nuts thoroughly with a hose to remove any remaining pulp. Then, spread them out in a single layer on a walnut cage in a cool, dry, well-ventilated area for two to three weeks to cure. 

How to Crack Black Walnuts

The first step to cracking black walnuts is ensuring they have been properly prepped. Before cracking, you should;

  • Clean the walnuts - Ensure all of the green husks are removed

  • Leave to air dry for 2-3 weeks

  • Soak in water for 24 hours to make the tough shells less brittle

Unlike their English counterparts, black walnut shells are extremely hard and require a heavy-duty approach. A standard nut cracker will not work; you will need a black walnut nut cracker for the job.

How to Eat a Black Walnut

Once you’ve successfully shelled your walnuts and removed the kernels, black walnuts offer a unique, potent flavour that is earthier and more intense than English walnuts. There are a couple of different ways to eat black walnuts, some of our favourites are;

  • Raw: They can be eaten as a healthy snack straight out of the shell. A small handful is incredibly flavorful and filling.

  • Baking: The strong flavour holds up well during baking. They are a classic addition to banana bread, carrot cake, and cookies. A popular favourite is black walnut fudge or ice cream.

  • Savoury dishes: Use them as a crunchy topping for salads, or incorporate them into savoury dishes like stuffing, pesto, or as a garnish for roasted vegetables.

Top tip! If you’re not ready to enjoy your black walnuts straight away, shelled black walnuts can be stored in an airtight container in the refrigerator for several months or in the freezer for up to a year.

If you have any questions about black walnuts or our products, get in touch with our helpful team today. 

Ultimate Guide to Nut Preparation

Ultimate Guide to Nut Preparation

If you love harvesting nuts, you know that nut harvesting and nut cracking efficiently while getting clean nut meat can be a challenge. At Grandpa’s Goody Getter, we’ve spent generations perfecting the art of nut preparation from hulling to washing, soaking, storing, and cracking. 

Whether you’re learning how to prepare walnuts for the first time or you’re looking for some essential nut preparation tips and tricks, this guide covers everything you need to know. From gathering and hulling your nuts properly to storing your nuts before and after cracking, you’ll learn the complete process to ensure clean, flavorful, high-quality nutmeats every time. This nut preparation guide covers:

  • Why Proper Nut Preparation Matters for Preparing Black Walnuts

  • Step 1: Gather and Hull Your Nuts Properly

  • Step 2: Washing Your Nuts

  • Step 3: Drying and Storing Your Nuts

  • Step 4: Soaking Before Cracking

  • Step 5: Storing Nuts Before and After Cracking

  • Special Notes for Hickory Nuts

  • Special Notes for Pecans

  • Best Tools for Nut Preparation

  • Final Tips for Perfect Nut Preparation

Let’s get started!

How to Prepare Walnuts: Tips for Hulling, Soaking, and Cracking

Proper nut preparation is key to protecting the health benefits of black walnuts and other tree nuts. Correctly hulling, washing, soaking, and storing your black walnuts, hickory nuts, and pecans ensures that your nutmeats stay clean, flavorful, easy to extract, and rich in nutrients like Vitamin E and omega-3 fatty acids.

Skipping steps can lead to:

  • Moldy or spoiled nuts

  • Crumbling nutmeats

  • Difficult, inefficient cracking

  • Waste of your harvest

Following a structured approach also ensures that your black walnut shells and outer hull are removed properly, giving you the best-tasting nutmeats for snacks, baking, or making nut butters. Whether you’re harvesting from black walnut trees in your backyard or collecting wild foods from the forest, a clean nut processing area and proper nut harvesting tools make a huge difference in efficiency and safety.

[H3] Step 1: Gather and Hull Your Nuts Properly

After gathering your black walnuts, hickory nuts, or pecans, hulling them as soon as possible is critical. If you're new to harvesting, this is the first and most important step when learning how to prepare walnuts at home. If you can’t hull them immediately:

  • Store them in breathable mesh bags, like an onion sack or our 18" x 32" Mesh Bag.

  • Never store nuts in a sealed bucket or barrel; they will mold in just a few days.

How to Hull Black Walnuts: Best Hulling Methods

  • Commercial Huller: Quick and clean.

  • Cement Mixer Method: Toss a few rocks in and mix to scrub the fibrous hull off. Messy but effective.

  • Driveway Method: Spread nuts and drive over them with a 4-wheeler, tractor, or car.

  • Manual Hulling: Step on them one at a time or use any method that works for you.

These are all proven strategies for anyone learning how to hull black walnuts effectively.

Tip: Avoid husk flies and decomposing hulls, which can affect flavor and quality.

Step 2: Washing Your Nuts

Washing is especially important when learning how to prepare black walnuts. Washing your nuts ensures clean, flavorful nutmeats and long-lasting storage. It also helps protect the quality of nuts harvested from black walnut trees, which can have tough outer hulls and fibrous debris.

At Grandpa’s Goody Getter, we recommend a few proven methods depending on your setup:

  • Cement Mixer + Water – Add a few rocks to help scrub the hulls off black walnuts. This method is fast and effective for large batches. (Tip: The process can get messy, so plan accordingly.)

  • Wire Cage + Power Washer – Great for medium-sized batches and ensures a thorough clean.

  • Wheelbarrow or Mesh Bag Wash – Place nuts in a wheelbarrow or breathable mesh bag, cover with water, and stir with a rake. Hose thoroughly with a spray wand, turning frequently to remove debris.

Check Your Nuts

  • Use the float test: nuts that float high are usually bad and should be discarded.

  • Nuts that float slightly are questionable.

  • Note: After several weeks of drying, some good nuts may float due to air pockets — this is normal.

Step 3: Drying and Storing Your Nuts

Proper drying and storage are essential to prevent mold, maintain flavor, and make cracking easier.

Drying Nuts

  • Spread your black walnuts, hickory nuts, or pecans out in a well-ventilated area or use breathable mesh bags like our durable and convenient 18" x 32" Black Walnut Nut Mesh Bag.

  • Never place nuts in a sealed bucket, plastic container, or solid box — lack of airflow will cause them to mold quickly.

  • Ensure nuts are completely dry to the touch before moving to long-term storage.

This step dramatically improves results when preparing black walnuts.

Storing Nuts

  • Store nuts where squirrels and other animals cannot access them; they love black walnut trees and will empty a bag quickly.

  • Use breathable sacks or mesh bags to maintain airflow on all sides.

  • Nuts can be kept for weeks while drying, and with proper care, even older nuts (several years old) can still be usable if handled correctly.

  • For soaked nuts awaiting cracking, store in a sealed container for up to one week to maintain moisture. If they dry out, repeat soaking as needed.

This step is crucial for anyone researching how to prepare walnuts for long-term storage.

Step 4: Soaking Before Cracking

Soaking softens shells and makes cracking shells easier without damaging the nut meat. It also reduces the amount of shell fragments that can break off and mix with your nuts during the cracking process. Consider nut size, as larger black walnuts or hickory nuts may need longer soaking times than smaller pecans or hazelnuts.

How to Soak

  • Sample-crack each day to check softness.

  • Most nuts need 2 days, some up to 8 days.

  • Once ready, let them dry to the touch before cracking.

Step 5: Storing Nuts Before and After Cracking

This final stage completes the full process of how to prepare walnuts, from harvest to long-term storage.

  • Soaked nuts can be stored in a sealed container for up to a week.

  • Re-soak if they dry out again.

  • Properly handled nuts can last for years.

  • Nutmeats freeze well and can be thawed repeatedly without losing quality.

Special Notes for Hickory Nuts

Smooth Bark Hickory Nuts

  • Usually too tough to crack right after falling.

  • Store in a breathable container for 1 year to allow nutmeats to shrink from the shell.

  • Exception: Fresh smooth bark nuts with hulls can be cracked immediately.

Shagbark Hickory Nuts

  • Crack immediately after falling — works for several weeks.

  • Older nuts: soak 1–2 days, dry 2 days, then crack.

Special Notes for Pecans

  • Pecans crack better after soaking for 6 hours, unless extremely fresh.

Best Tools for Nut Preparation

For the best results, pair your nuts with Grandpa’s Goody Getter nut harvesting tools and accessories, which are all assembled in the USA and designed to make nut cracking and processing efficient, safe, and enjoyable.

Black Walnut Nut Cracker

Our Black Walnut Nut Cracker tool is hand-built in the Ozark Mountains, American-made, and backed by a lifetime guarantee. Engineered for the toughest nuts, this Black Walnut Cracker easily handles black walnuts, hickory nuts, pecans, and even hybrid walnut-pecans. Its durable construction and mechanical advantage make cracking large, stubborn shells almost effortless, saving time and reducing frustration. If you're looking for a serious nut processing tool, the Black Walnut Nut Cracker is your go-to.

Small Nut Ram

The Small Nut Ram is a solid steel ram designed for smaller nuts like hazelnuts, apricot pits, tiny pecans, and even tough hickory nuts or the occasional walnut-pecan hybrid. Thanks to its compatible bottom ram fit, it’s easy to switch in and out of your nut cracker, giving you more flexibility and precision for delicate cracking. Perfect for handling smaller or more intricate shells without damaging the nutmeat inside.

Shears

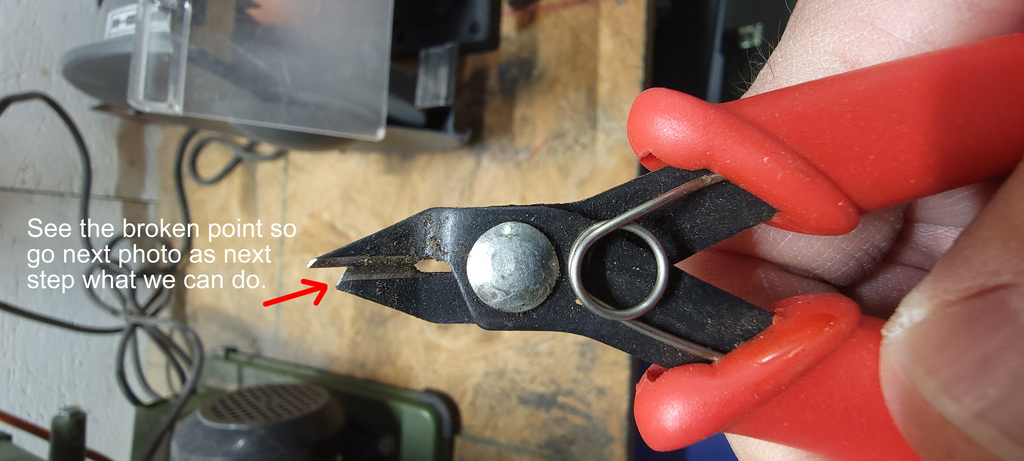
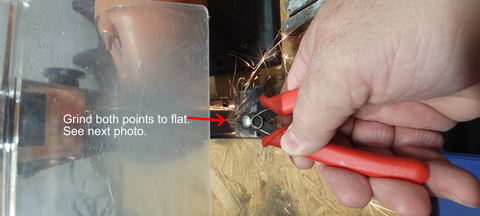
These durable steel snippers are perfect for trimming and cutting through tough nut shells cleanly and safely. After cracking, use the shears to extract large nutmeat pieces without crushing or damaging them, making your harvest cleaner and more efficient.

18" x 32" Black Walnut Nut Mesh Bags

Our heavy-duty mesh bags are lightweight, breathable, and ideal for drying, rinsing, and storing nuts without trapping moisture. The same style commonly used for onion bags and hulling stations works perfectly for processing Midwestern walnuts, tough hickory nuts, and black walnuts. Bags can be purchased individually or in a 5-pack, depending on your needs.

Black Walnut Washing Cage 

Pre-washing nuts is simple with the Black Walnut Washing Cage. Designed for easy use with water, it scrubs and rinses nuts efficiently while preventing them from bouncing away. Ideal for mid-sized batches of walnuts, hickory nuts, or pecans, this tool reduces labor and ensures your nuts are clean and ready for drying or cracking.

When used together, these tools create a complete system for nut preparation from harvest to cracking, ensuring every nut is handled with care, cleaned properly, and cracked efficiently.

Tip: Proper tools reduce shell fragments, prevent damaged nut meat, and make nut harvesting methods easier.

Shop our full collection of Nut Cracking Tools & Accessories now →

[H3] Final Tips for Perfect Nut Preparation

As you finish preparing your black walnuts, hickory nuts, pecans, or other wild harvests, here are a few final reminders to ensure the best results:

  • Always store nuts in a protected space where squirrels and other animals can’t reach them, as they’ll empty a bag faster than you think!

  • Check your nuts daily during soaking - The goal is soft, easy-to-crack shells and clean, intact nutmeats.

  • Don’t worry if your nuts are older - With proper soaking and handling, even 2–3-year-old walnuts can revive beautifully and taste nearly as fresh as the day they dropped.

  • Use the right tools for the job - A reliable Black Walnut Nut Cracker, breathable mesh bags, shears, and washing cages make every step cleaner, faster, and more efficient.

With these techniques and tools from Grandpa’s Goody Getter, your nut harvesting and nut processing experience will be easier, more enjoyable, and yield high-quality nut meat packed with Vitamin E, omega-3 fatty acids, and all the health benefits of tree nuts.

Discover our Black Walnut Nut Cracker and nut-cracking accessories today →


Black Walnuts are a Wild Crop To Forage


Black Walnuts are a Wild Crop To Forage

By @BlackWalnutDaddy
Black walnut is a name (generic term) for the wild walnuts native to North America. There are several species, one main species east of the Rocky Mountains, and several other species in California, Arizona, Texas and Mexico. These nuts grow widely in the Midwest, and many other eastern and southern states throughout the U.S.A. Even as far north as Minnesota and Canada have black walnuts thriving in the wild, as well as residential areas.
Black walnuts nuts are known for their incredible, rich fruity flavor. Their gourmet taste is popular and sought-after. However, in the nut industry, they are the hardest nut to crack. That is why they are rarely used as an ingredient in commercial restaurants and foods.
However, collecting and processing black walnuts is a big business in the Midwest, especially in Missouri and neighboring states. Processors harvest the nuts and the shells. The hard shells are sought after in commercial scrubbing and cleaning supplies, cat litter and much more. Because of this, harvested bulk nuts are available for purchase.
Black Walnuts have a stronger flavor than the cultivated English walnut, that some describe as “fruitier” and more flavorful. Fans of the nut describe their taste as wilder, concentrated, and even a touch more bitter. To many, they taste amazingly wonderful!
Common walnuts you buy in stores are English (also called Persian) walnuts. These are larger and easier to shell than black walnuts. The difference in taste has also been compared to the difference between cream and skim milk, grouse and chicken, a wild strawberry and one of those huge, big-farm strawberries cultivated in California or Mexico. The taste of black walnuts is simply different. A better different.
A handful of black walnuts are excellent to eat plain or used when baking a cake, cookies, brownie. or even used in a cream sauce on a chicken or grouse breast. Options for black walnut recipes are seemingly endless, many of which don't require a lot of walnuts, due to their rich flavor. The flavor is also so good and strong that many recipes say just half the number of black walnuts will fully replace the flavor of English walnuts. Many prefer black walnuts over regular ones any time without question.
You can find sources to purchase shelled black walnuts, or you can shell them yourself. Harvesting nuts and fruits, plus processing them into ingredients is not an easy task, it does require a lot of time, resources and some tools.
Access to black walnuts is typically free. You can find them forging on public land, and many private landowners will grant you permission to take them. Truth be told, blankets of black walnuts on lawns and fields are quite messy and cumbersome. Especially for lawn mowers. They can also stain driveways and sidewalks or twist an ankle if someone has an accident when stepping on them. They can be seen as a ugly, messy, nuisance and people are likely to want them collected and gone. The opportunity to forage for black walnuts is out there. Go for it!
See insights
All reactions:
6
Broken shears - What to Do?

Broken shears - What to Do?

Customers,

We can help you with that broken shears. We share the photos what to do with the broken ones. Just grind and reuse till no reuse again. Here are:

shear1

shear2

shear3

shear4

shear5

shear6

shear7

OR

Other way to do - see other photos below:

shear8

shear9

shear10

shear11

shear12

shear13

shear14

shear16

shear17

shear18


Done.. all to go and reuse. Enjoy your cracking!!